4. Working with Signature Rules
To create a rule which will insert signature to specific messages click the Add Rule button on Signature Rules node. This brings up the rule wizard, where you can configure conditions and template content of the signature.
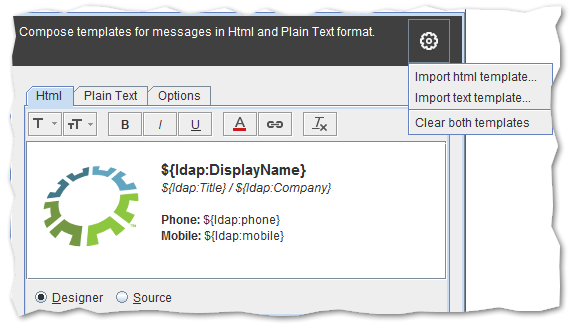
On the Signature tab in the html and text section enter the contents of the disclaimer. You can copy the template directly from mail client, Microsoft Word or other editor as the program supports html code. Also importing templates is available. Alternatively you can enter and format the text directly in the window since it provides standard controls, such as the font face, size and color selection, hyperlink inserting and more.
For more advanced formatting you can use html source view of the signature template.
In the Conditions tab select what message properties trigger inserting the signature. Click the Add button to insert a condition.
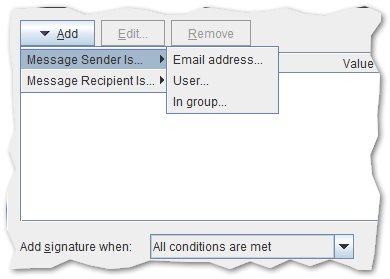
More detailed information about each condition could be found in Conditions and Exceptions section.
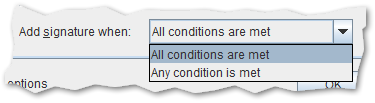
If more than one condition is defined you can decide if the message must meet all or just one of them to insert signature template with the Add signature when option visible at the bottom of the wizard window.
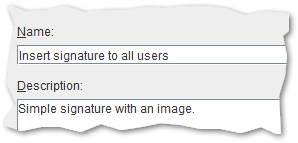
Finally you can edit the name and description of your rule in the rule Name tab.
Click OK then Save All button. That’s it - your signature is ready to work.
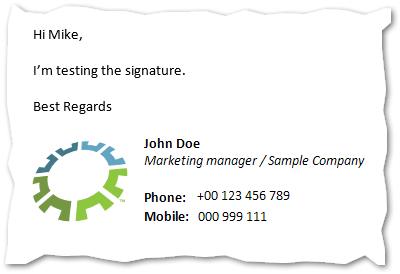
Send the test message to see how your signature looks.